


What is AWS EC2 Instance?
An EC2 instance is nothing but a virtual server in Amazon Web Service. It stands for Elastic Compute Cloud.
An on-demand EC2 instance is an offering from AWS where the user can rent the virtual server per hour and use it to deploy his/her own applications on different Linux servers as per the user’s choice.
The instance will be charged per hour with different rates based on the type of instance chosen by the user.
In this tutorial, we’re going to learn, how to create an EC2 Instance and set it up to deploy your Web Apps on an EC2 Instance, and here I assume that you already have an AWS account.
Step 1. Login to your AWS Account
Login into your AWS Account and you’ll be redirected to the Amazon Management Console Home.
Here, you’ll see all the services of AWS like – Register a Domain, Host a static website, connect to IoT, Deploy a Serverless Microservices
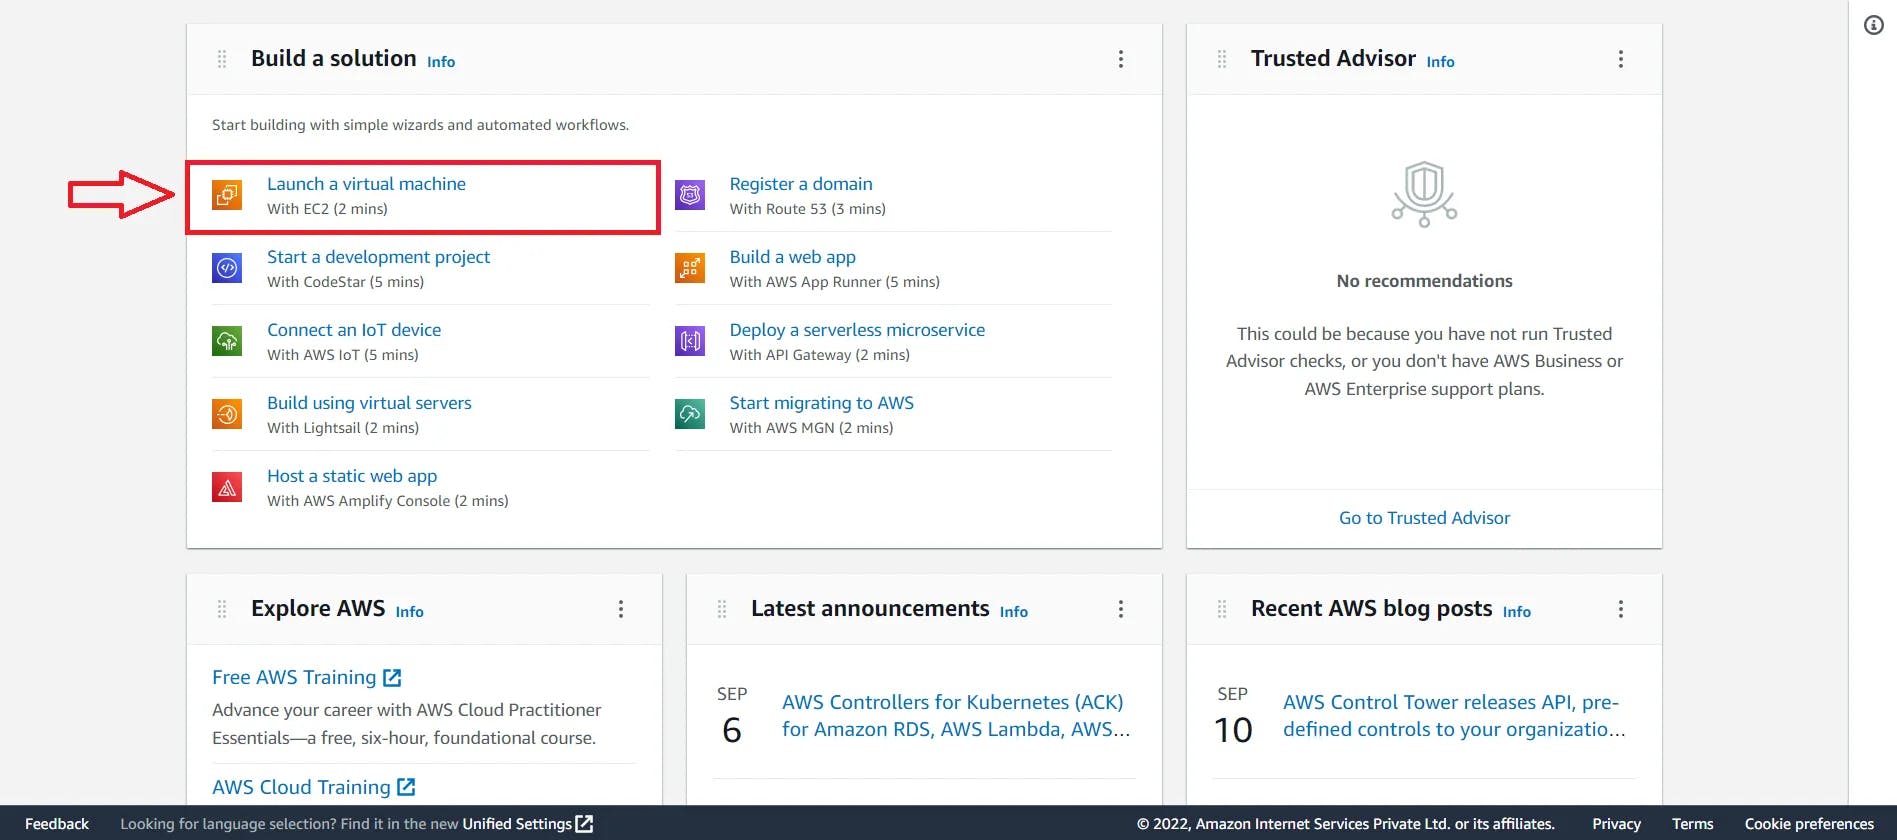
- Here, we are going to select Launch a virtual machine, as shown in the above image.
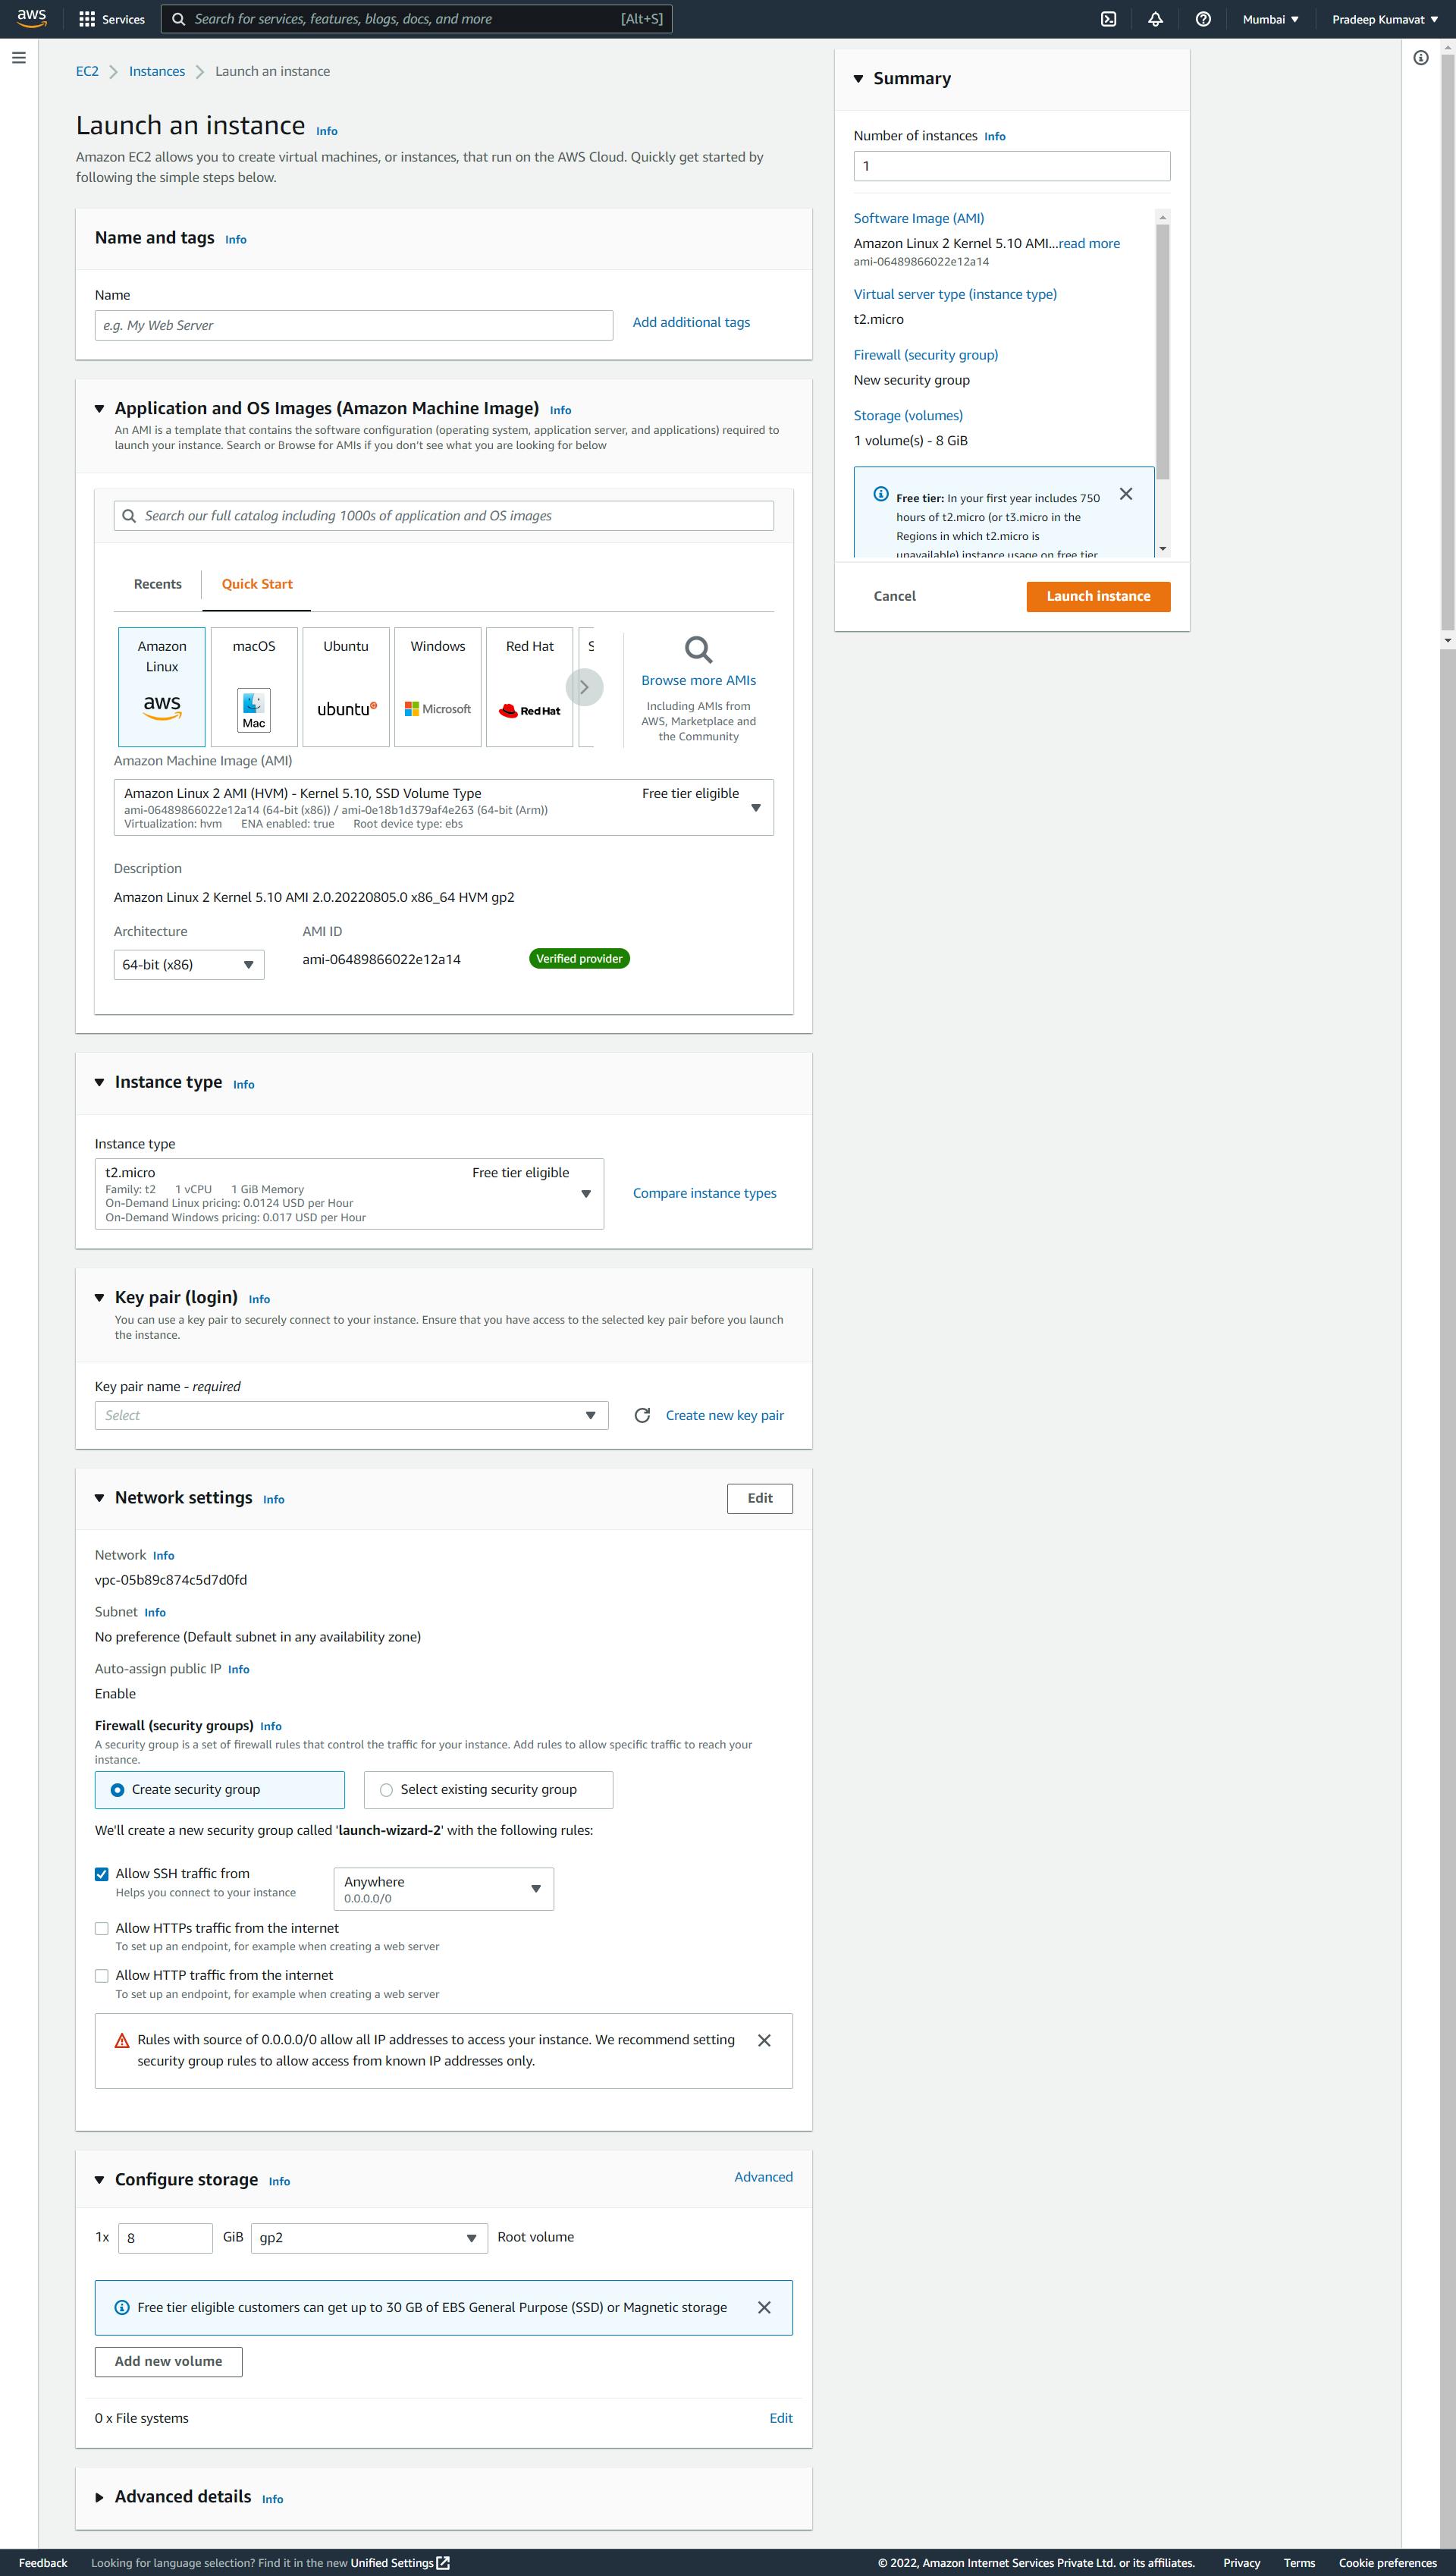
when you click on Launch a virtual machine, the above page will be loaded, and I’ll show you the step-by-step guide to configure the EC2 Server.
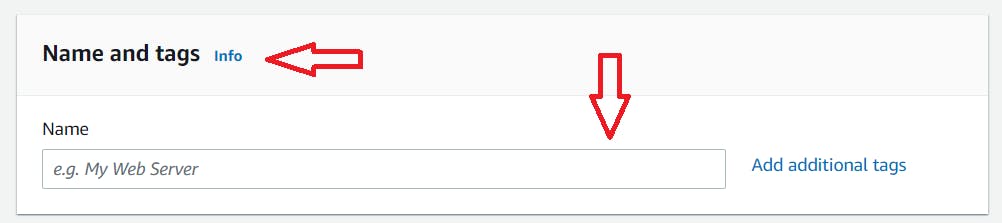
now the first step is to give the Name to the EC2 Instance you want to create.
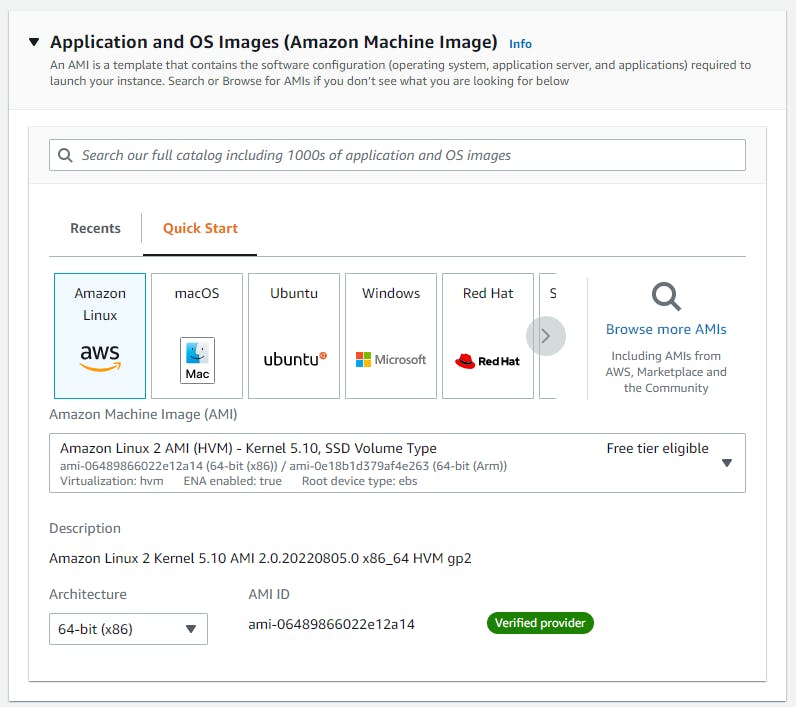
after giving the EC2 Instance Name of your choice, now you’ve to select the type of Linux Server you want as per your requirements (below is the option), here I am going to select Ubuntu as I’ve experience writing & using Terminal commands in Ubuntu Linux, and for AMI (Amazon Machine Image) & Architecture – I am selecting the default option.
now I am going to select the Instance Type
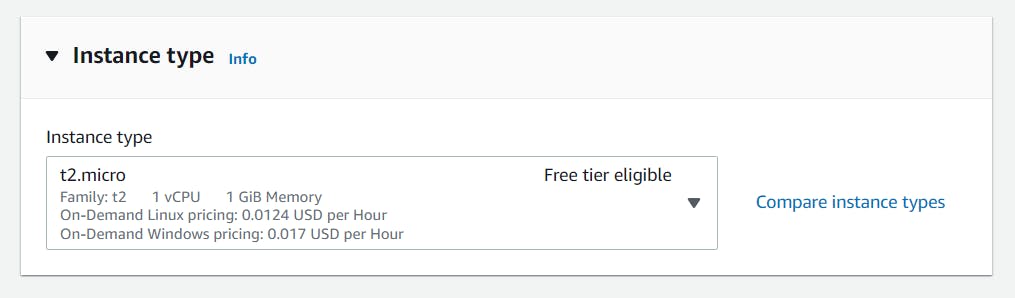
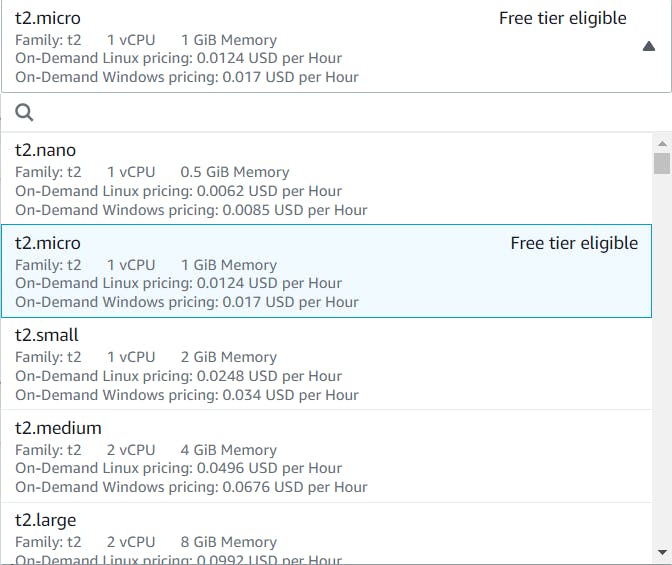
from the above Image, you can select the Instance type as per your requirements & usage, but here I’m selecting t2.micro – Free tier eligible based on my requirements & usage.
now we’ve to create Key pair (login) which will be required to log in EC2 Server using SSH.
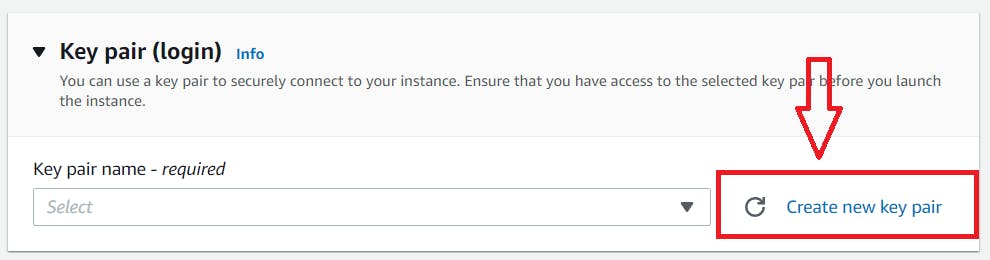
from the above Image, click on Create new key pair to create a new key pair (login)
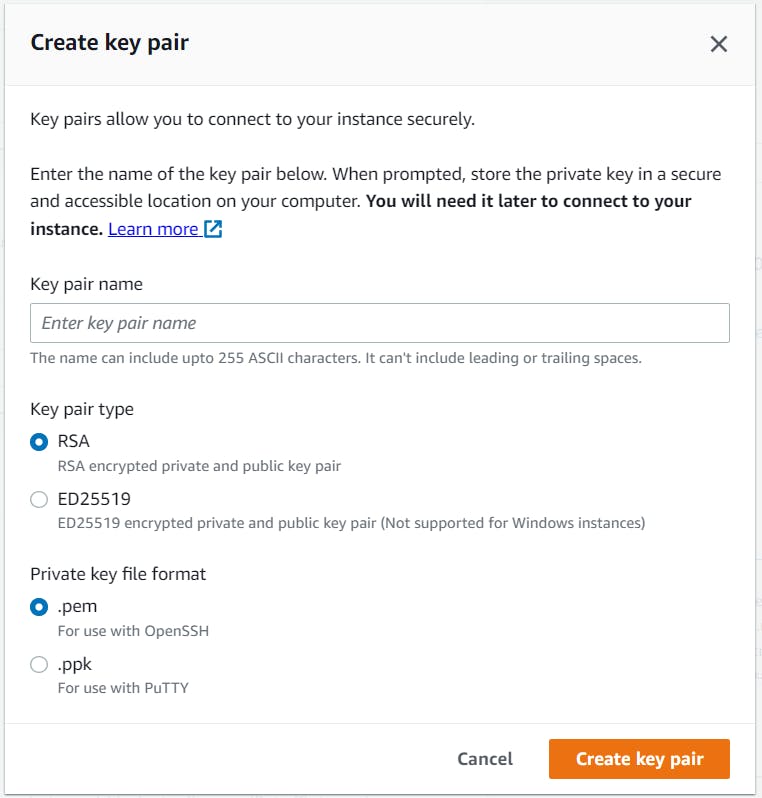
when you click on Create new key pair above shown a popup will come up to fill in the details, in the above Image give the key pair name – a proper naming convention to identify it later and select RSA & .pem format and click on Create key pair button to create the key pair file, and please remember to store them .pem at the appropriate & secure directory because after creating the key pair you can’t re-download the .pem file again.
now we’re going to make some Network settings which will be as below.
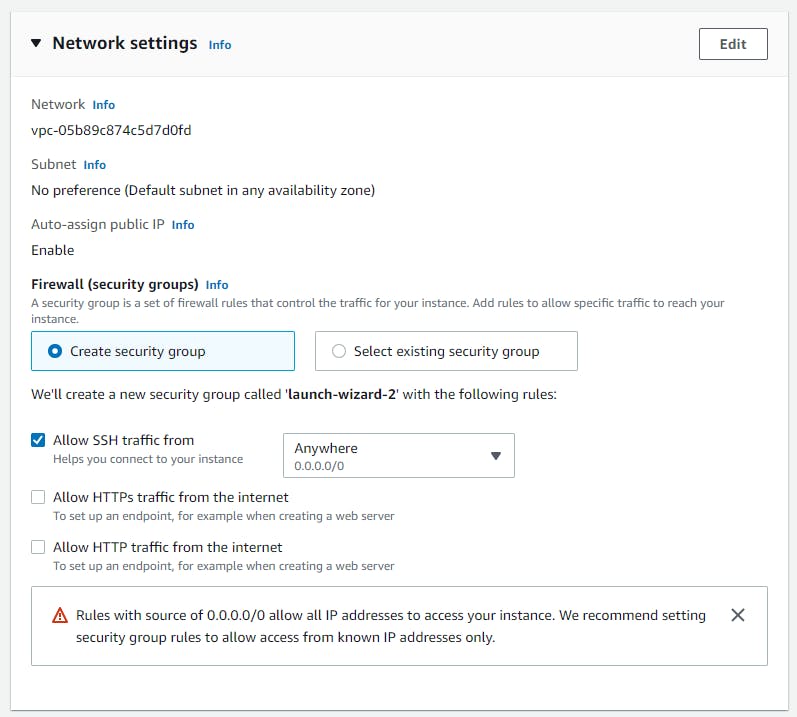
at this place, we’re not going to make any changes in the Network Settings.
now the last step for creating the EC2 Instance/Server is the total Storage we need for the Server.
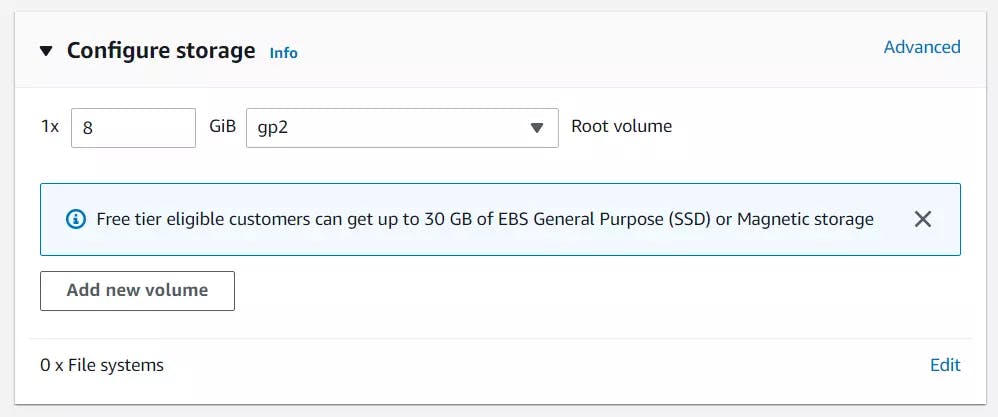
here, you can use any GB of storage as per your requirements/needs, but I’m going to use 30GB of SSD which comes under Free Tier from AWS and it’s suitable for my requirements/needs.
and once you have done all the above configurations, you can click Launch Instance on the right side. and then your Instance will be created.
once the EC2 Instance is created you will be redirected to the EC2 Dashboard Page will look like the below.
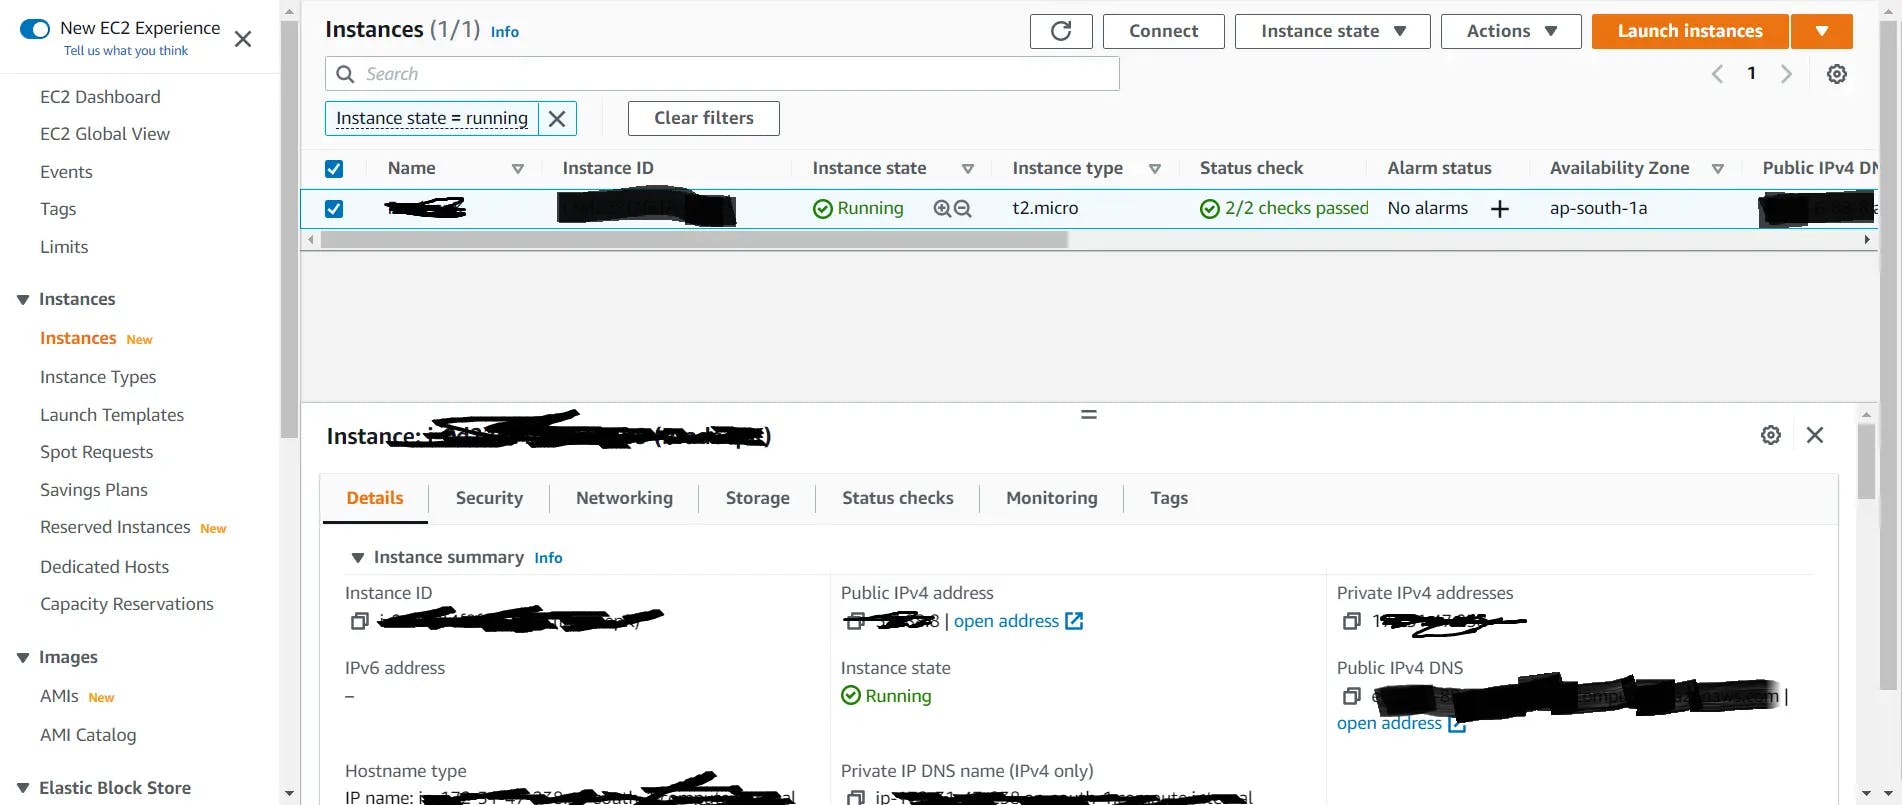
when you click on the Instance Name, exactly below to that all the details will be shown e.g. Public & Private IPv4 Address, Instance State (whether running or what), and Public IPv4 DNS which will be used to connect to EC2 Server using SSH.
if you copy the Public IPv4 Address and paste it into the browser and if you try to access it, it won’t work, as we’ve to update the Security Inbound Rule in order to access the IP Address from the Browser.
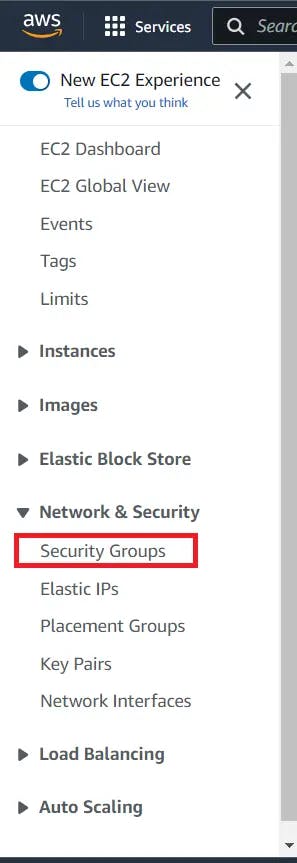
in the sidebar from EC2 Instance Dashboard, scroll down and search for Security Groups in the Network & Security Tabs, and click on the Security Groups
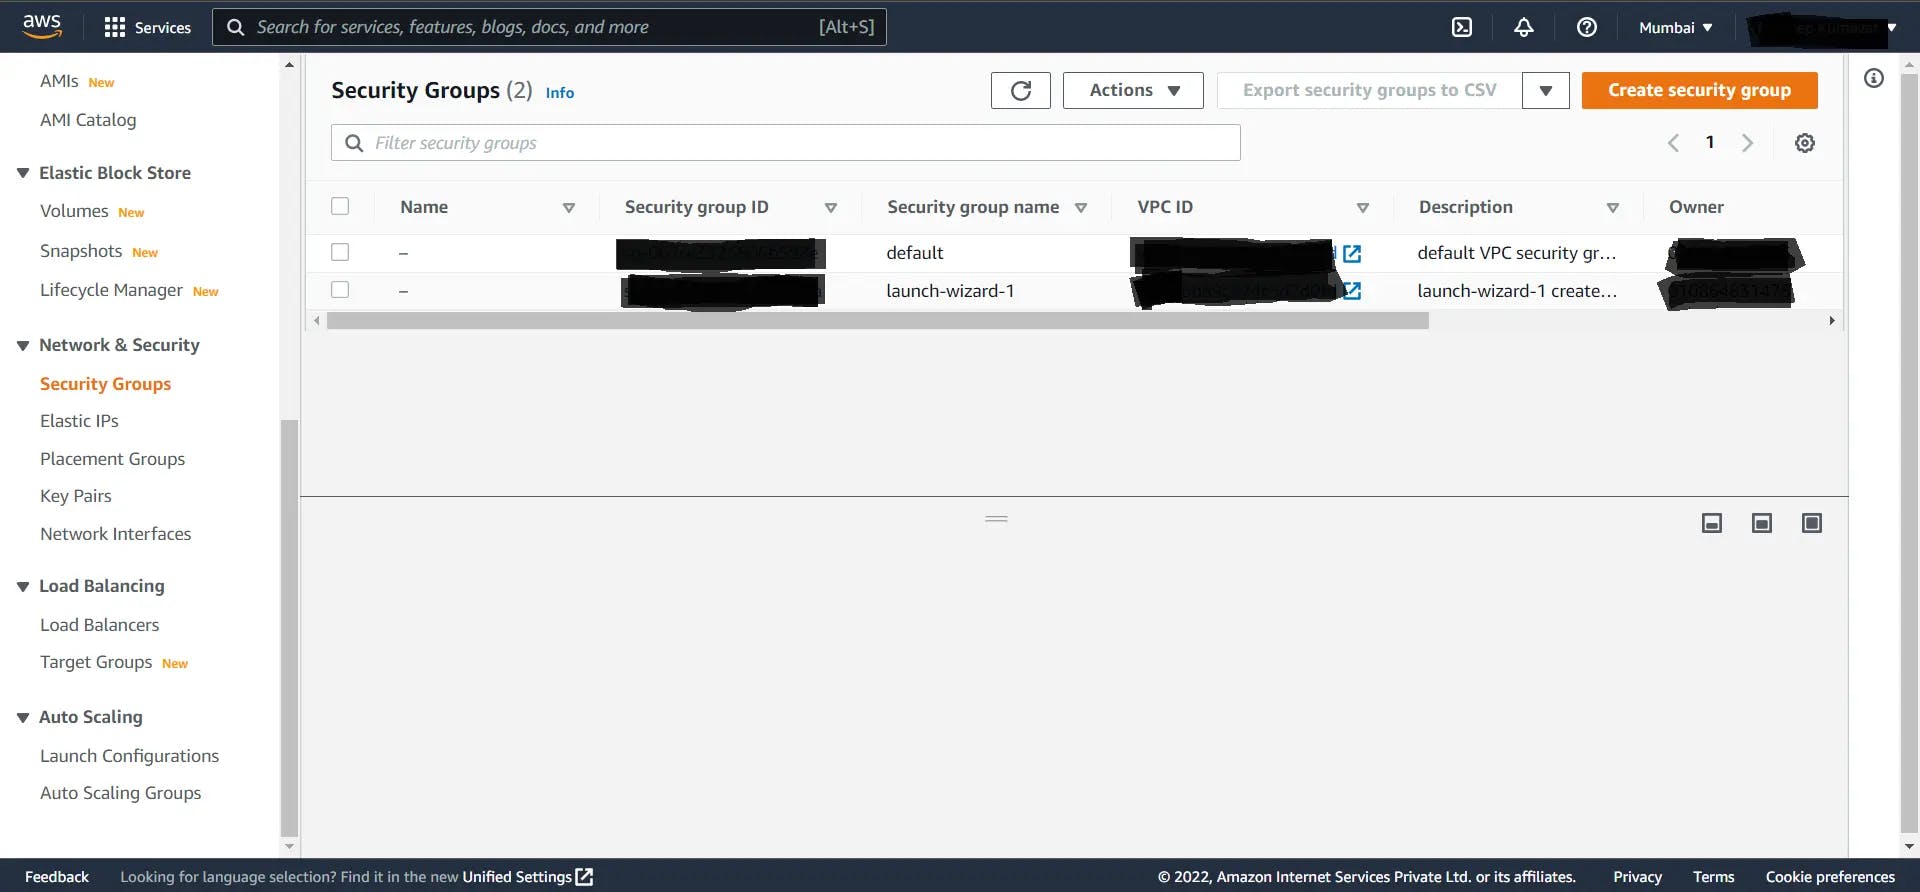
after clicking on the Security Groups you will see the above page, now from the Security Groups Page, you’ve to select the appropriate Security Group to verify the Security Group ID from the EC2 Dashboard > Select Instance > and Security, and after confirming the Security Group ID, click on the Security Group ID then below page will open
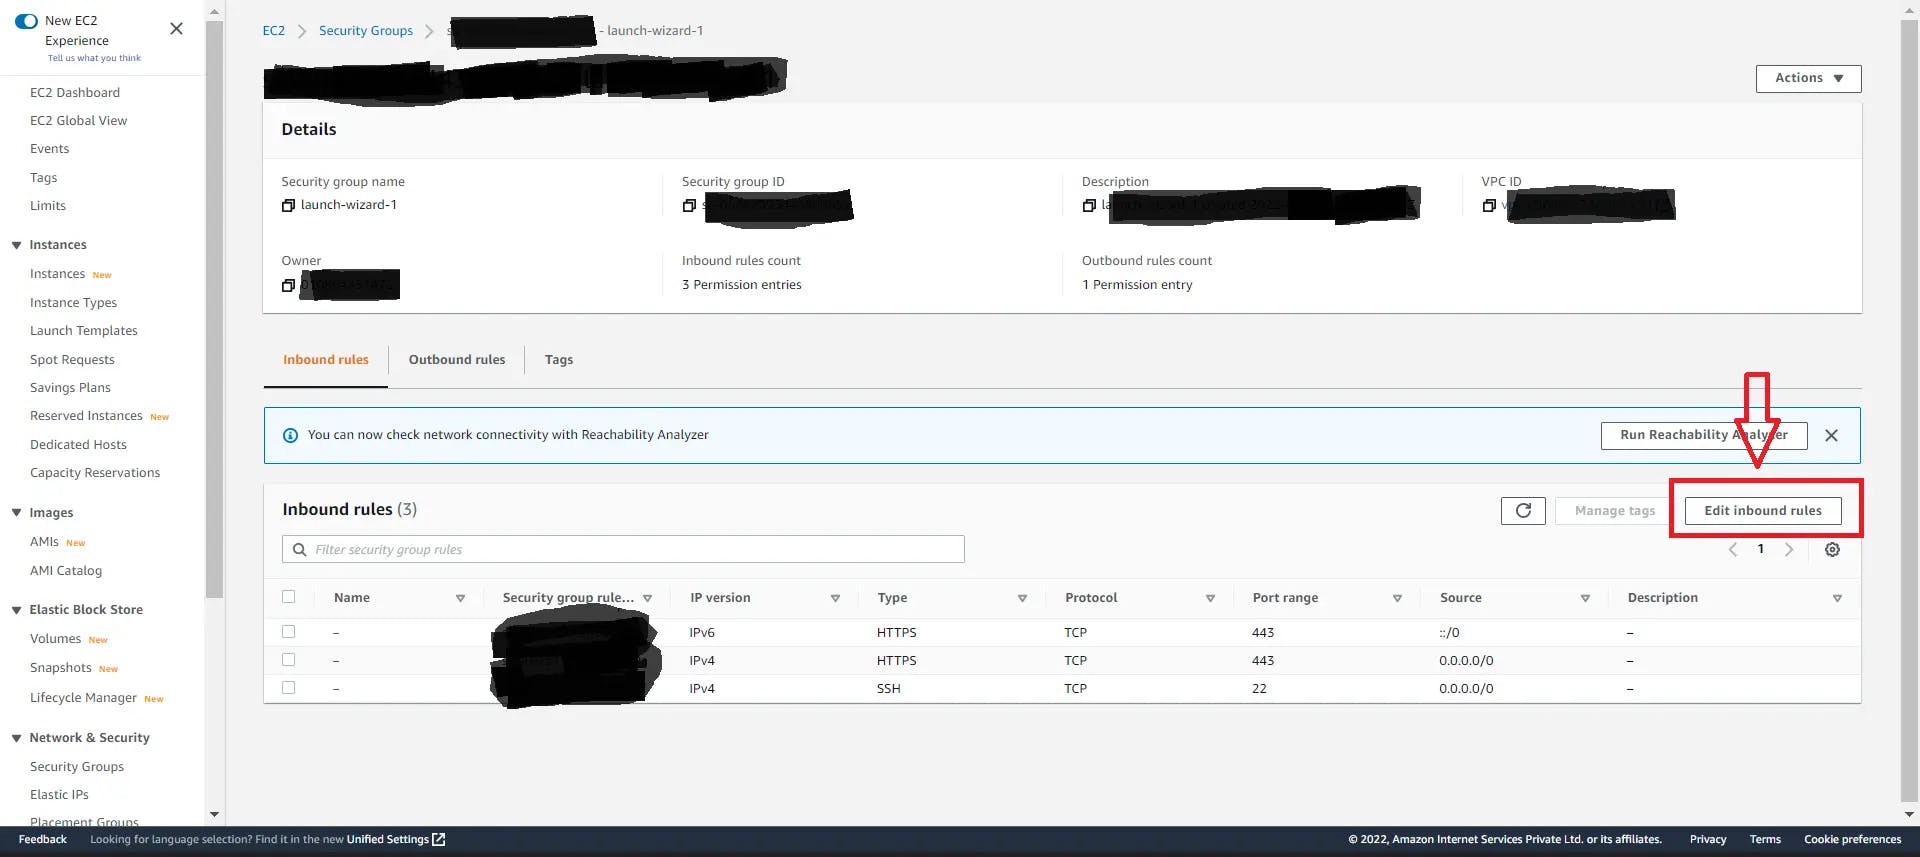
from the above Image, as highlighted in red color, click on Edit Inbound Rules which will open another page where you’ve to add the Inbound Rules in order to access the IP Address / Website which you’ll deploy on the EC2 Server you created.
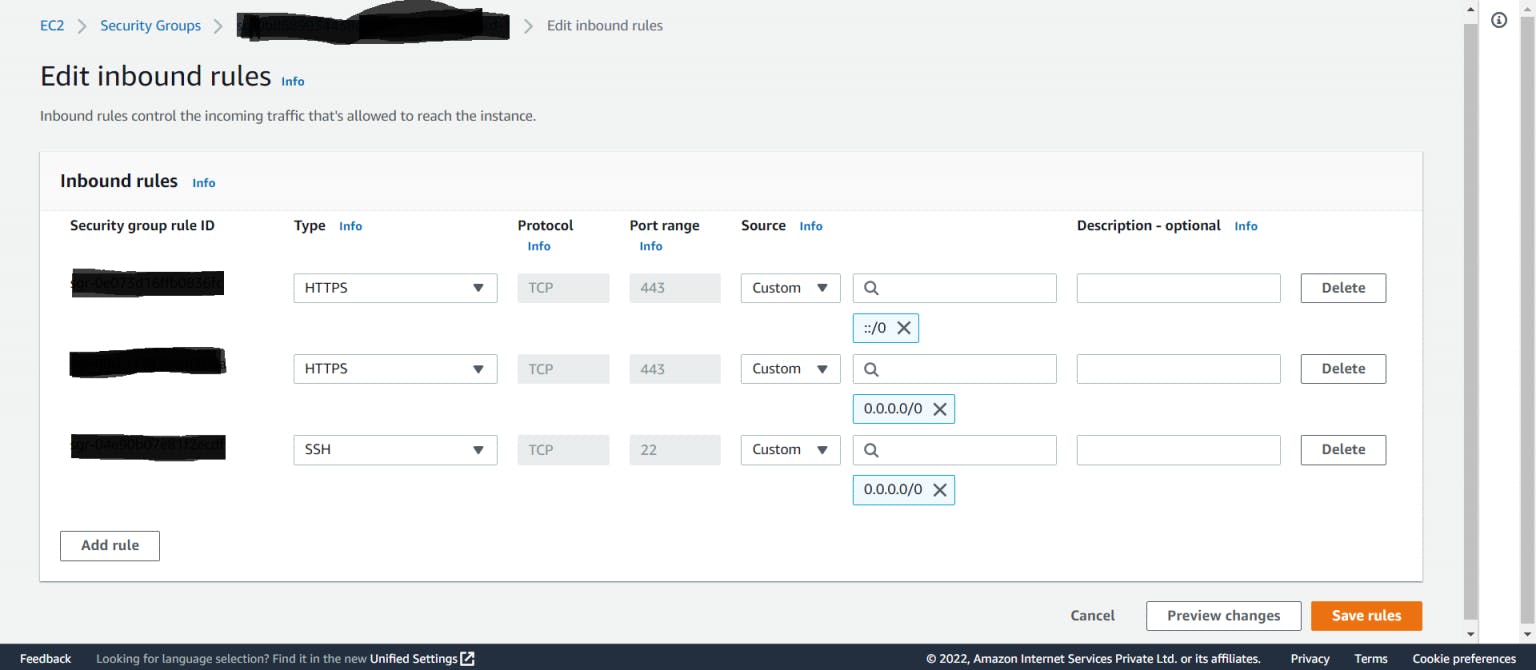
now here, don’t touch the SSH setting as we need this SSH Setting to access the EC2 Server we created using SSH Client (e.g. PuTTY, Termius, Windows Powershell) but mostly I prefer to use Termius to connect to EC2 Server using SSH.
in the Inbound Rules, we’re going to add the following 4 Rules which will allow you to access the Website either using the IP Address or the Domain Name you’ve pointed to. Here are the following 4 Inbound Rules that need to be added:
| Type | Protocol | Port Range | Source | IP Address |
| HTTP | TCP | 80 | Custom | ::/0 |
| HTTP | TCP | 80 | Custom | 0.0.0.0/0 |
| HTTPS | TCP | 80 | Custom | ::/0 |
| HTTPS | TCP | 80 | Custom | 0.0.0.0/0 |
| SSH | TCP | 22 | Custom | 0.0.0.0/0 |
now hit the Save rules button, and boom you’re done with the setup of the AWS EC2 Instance.
also, on the EC2 Linux Server, once you added the SSL Certificates for the Domain Name you’re pointing to, please delete the first two HTTP Protocol from the Inbound Rules, only accept HTTPS not HTTP, and after removing the HTTP following the will be updated inbound rules.
| Type | Protocol | Port Range | Source | IP Address |
| HTTPS | TCP | 80 | Custom | ::/0 |
| HTTPS | TCP | 80 | Custom | 0.0.0.0/0 |
| SSH | TCP | 22 | Custom | 0.0.0.0/0 |
to know more about me or want to read relevant & more blogs, find me on my website